How to claim your SolarCoin (kSLR)
A step-by-step guide for complete beginners. No prior crypto knowledge needed — about 15–20 minutes, and you will never be asked to pay anything.
First, the three words you keep seeing
Crypto has confusing names for simple things. Here are the only three you need right now (there is a full glossary at the bottom).
- Wallet — a free app that holds your SolarCoin. Think of it like a banking app on your computer. We will use one called MetaMask. It does not hold cash.
- Public address — your wallet’s receiving address, a long code that starts with 0x. It is safe to share, like an email address or IBAN. This is the “account id” you give to the SolarCoin portal.
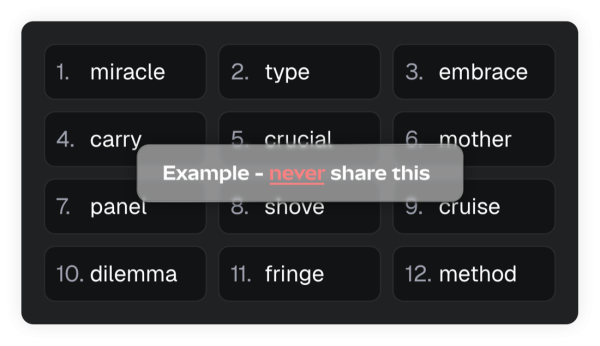
- Secret Recovery Phrase — a list of 12 words MetaMask gives you. It is the master key to your wallet. Never share it with anyone, ever — not even SolarCoin. Write it on paper and keep it safe.
What this costs you: nothing. You do not need to buy anything or hold any cryptocurrency to start. The SolarCoin Foundation covers the fees for your first 5 transactions, so claiming and receiving your kSLR is free.
Part 1 · Install the MetaMask wallet
Open Chrome and go to the MetaMask website
In the Chrome address bar, type metamask.io and press Enter, then click Get MetaMask. This is the one and only official site — bookmark it, and never download MetaMask from anywhere else.

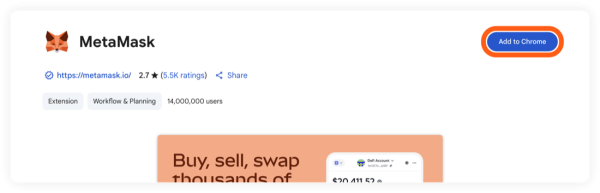
Click “Add to Chrome”
This takes you to the Chrome Web Store. Check that the verified publisher reads metamask.io, then click the blue Add to Chrome button.
Confirm by clicking “Add extension”
A small box drops down from the top of Chrome. Click Add extension.

Pin MetaMask so you can always find it
Click the puzzle-piece icon near the top-right of Chrome, then click the pin next to MetaMask. The orange fox now sits in your toolbar.

Part 2 · Create your wallet
Start setup — choose “Create a new wallet”
A MetaMask welcome tab opens. Click Create a new wallet. (If it asks to help improve MetaMask, either answer is fine.)

Secure your wallet — pick “Secret Recovery Phrase”
MetaMask asks how to secure your wallet. Click Use Secret Recovery Phrase at the bottom. This keeps your wallet fully in your own hands.

Create a password
Type a password twice, tick the box, and continue. This password only unlocks MetaMask on this computer — it is not your recovery phrase.

Part 3 · Save your Secret Recovery Phrase
Reveal your 12 words and write them on paper
Click Reveal Secret Recovery Phrase. Write the 12 words down in order, numbered 1 to 12, on paper. Then click Next.
Confirm your phrase
MetaMask asks you to fill in a few of the words to prove you wrote them down. Enter them and click Confirm.
Done — your wallet is ready
You will see a “Wallet creation successful” message, then your main wallet screen. Right now it holds nothing — that is normal.
Part 4 · Copy your address
Copy your public address
Click the orange fox to open MetaMask. At the top, click the short 0x… code next to your account name. A “Copied!” tick confirms it is on your clipboard. This 0x address is the safe one to share — it is not your 12 words.

Part 5 · Create your SolarCoin account and claim
The claim happens on the SolarCoin portal at claim.solarcoin.org. You sign in with Google or an email link, then connect the wallet you just made.
Open the SolarCoin portal and sign in
In Chrome, go to claim.solarcoin.org. Choose Continue with Google (fastest) or Continue with email to create your free account. No password to invent, nothing to pay.
Open “Migrate SLR” and connect your wallet
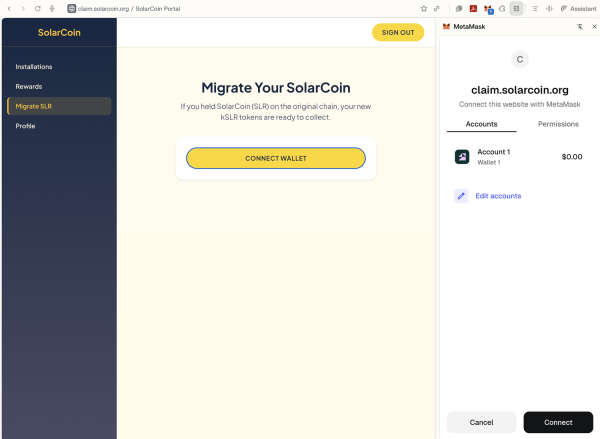
Once signed in, click Migrate SLR in the left menu, then Connect Wallet. A small MetaMask window opens — choose your account and click Connect.
Approve and finish your claim
Approve the connection in MetaMask. If the portal asks you to Switch Network, click it and confirm. Rewards are sent monthly, so your kSLR arrives on the next send-out — there is nothing more to do.
Part 6 · See your kSLR when it arrives
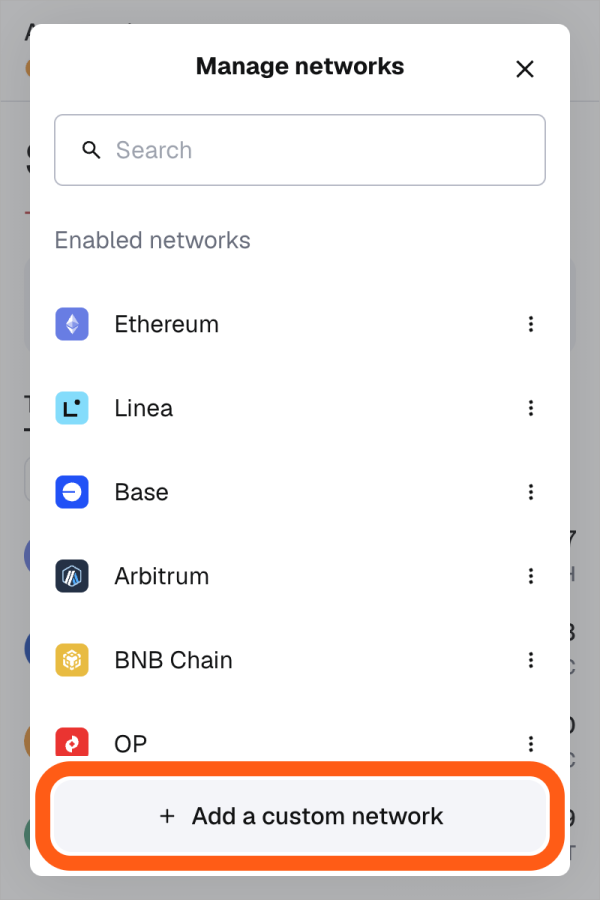
Once a send-out has happened, you can make your coins visible in MetaMask. Two small set-up steps, done once: tell MetaMask about the Base network, then add the kSLR token.
Open the network menu
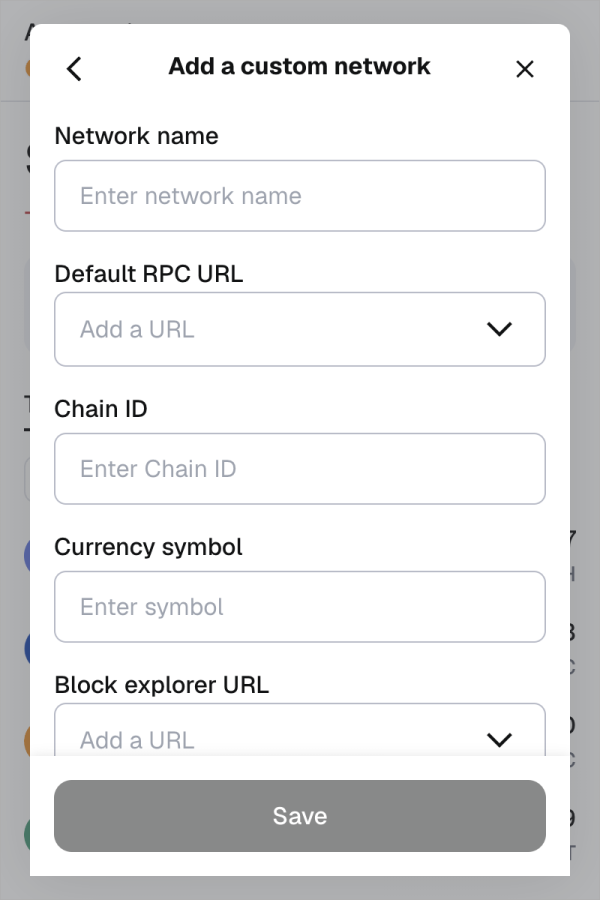
In MetaMask, click the menu icon (☰) at the top-right, then Networks, then Add a custom network. Your kSLR lives on a network called Base.

Type in the Base network details
Copy these exactly into the boxes, then click Save. These are the official public Base settings and are safe to use.
| Network name | Base |
| Default RPC URL | https://mainnet.base.org |
| Chain ID | 8453 |
| Currency symbol | ETH |
| Block explorer URL | https://basescan.org |
Switch to the Base network
Open the menu → Networks again and click Base. The top of MetaMask should now show “Base”.

Add the kSLR token
On the Tokens tab, click the ⋮ (three dots) on the right, then Manage tokens. Paste the official kSLR contract address below. MetaMask finds it — shown as SolarCoin on Base — so switch its toggle on.
kSLR token contract address (Base):0x7Aa7CB583084DeFc43cc0c2e95213ce364a8df9C
See your SolarCoin balance
With SolarCoin (kSLR) toggled on, go back to the wallet. kSLR now appears in your token list. After a monthly send-out, your balance will show here.

That’s it — you’re done
You have a wallet, you have made your claim, and you can see kSLR. Keep your 12 words safe and you are all set.
Plain-English glossary
- Wallet (MetaMask) — a free app that holds your coins. Like a banking app, except you hold the keys.
- Public address (“account id”) — your receiving code, starting 0x. Safe to share.
- Secret Recovery Phrase — your 12 secret words, the master key. Never share. Paper only.
- Password — unlocks MetaMask on this one computer. Different from the 12 words.
- Network (chain) — which blockchain you are viewing. kSLR is on Base.
- Base — the fast, low-cost network where new kSLR lives.
- Token — a coin that lives on a network. kSLR is a token on Base.
- Contract address — the token’s unique 0x ID, pasted into MetaMask so kSLR shows up.
- Gas / fee — the small cost of an action. SolarCoin covers your first 5.
- kSLR — the new SolarCoin token on Base.